The Dough Stretch
Having the perfect dough recipe is great, but if you do not know how to properly open or stretch a dough ball all that work quickly disappears. For beginners stretching dough can be one of the toughest techniques to master. There are machines like sheeters and dough presses that have been created to help expedite this process as well as take the “hard part” out of making pizza. The downfall with these machines is that it takes the artistry out of hand making pizza. They can negatively impact your dough by taking too much air out or heating the dough up, or even leave a not so pleasant taste from oil.
Improper stretching means a pizza that will be difficult to cook or one that will not cook properly.
The first thing I like to tell people is to think about stretching not as degassing or deflating but more as moving the gas towards the crust while defining the rim and giving it shape. Even though the middle is the thinnest part of most pizzas, there should still be gas present. It is only with thin or cracker thin pizzas that I am thinking about deflating. Before starting, making sure your dough is properly hydrated and matured as well as room temperature will make stretching easier.
There are three main techniques that I have come across to begin the stretching process and they are as follows.
Dough Stretching Technique 1
Starting with the edge of your dough ball furthest from you, make an indentation about an inch down from the top edge. Maintaining that inch distance from the edge, continue to make indentations all the way around until you get to your first mark. At this point, you should have what looks like a small hat. You have just defined your crust. Using flat fingers, flatten your middle. Your dough should now look like a miniature pizza.
Dough Stretching Technique 2
Working from the middle, press down working up towards the edge of your dough furthest from you, stopping about an inch from the edge. Some pizza makers either rotate the dough and repeat the same process or they flip the dough over and repeat the same process on the other side. If you flip the dough for the second pass you will need to rotate the dough a quarter turn on the third pass to make sure you evenly shape your dough. Once you have completed a full turn of the dough, stop. At this point you should have a miniature pizza.
Dough Stretching Technique 3
This technique is very similar to the first except while you are shaping your crust with your dominant hand, the other is on the outside of the crust, and while you are depressing the dough where you want your crust to be you are using the outside hand as a wall to slightly compress the crust. Your hand creates the letter T with the crust in between your fingers of your dominant hand and the palm of your opposing hand. This technique is very popular with the New York style of pizza and can be commonly heard as squaring off your edge. This technique tends to
degas your crust a little more than if you were to not, but it is not considered wrong for the style.
Now that you have a defined crust and a miniature pizza it is time to stretch it to the appropriate size. There are two main techniques here with slight variations.
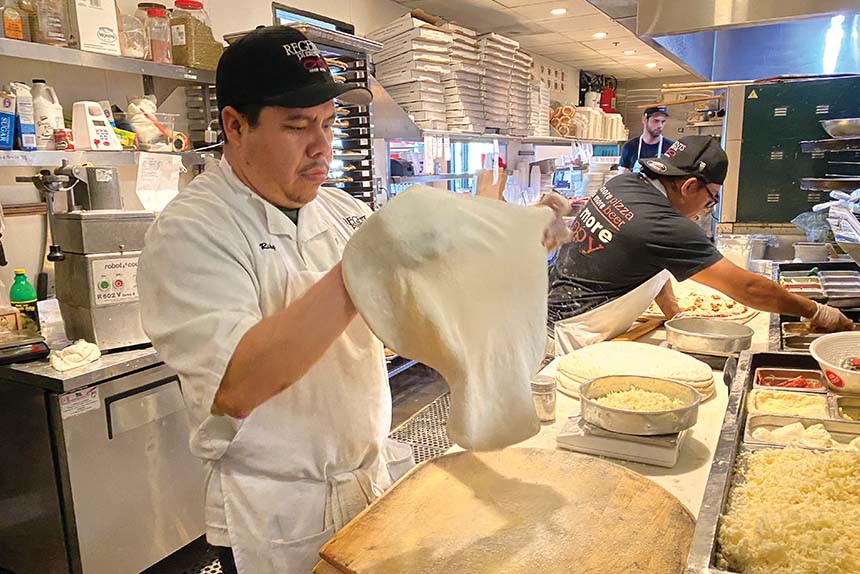
The Neapolitan slap is very common amongst Neapolitan pizza makers but is becoming more widely used amongst other styles. Once they have defined their crust, they pick the dough up with their dominant hand, flip the dough down flat on the table onto the opposing hand with palm facing up. When the dough lands on the opposing hand the goal is to have the crust land on the fingertips. From here the dominant hand is face down on the table around the middle of the dough holding it in place. The opposing hand stretches the dough along the crust without decompressing the air out. Once they have completed the stretch the hands flip transferring the dough back to the dominant hand as it rotates the dough slightly repeating the process until they make a full 180-degree rotation or the pizza is the adequate size.
The second technique is the one I use the most. Once I have the shape defined, I place my hands together with my fingertips touching right underneath the crust at the top of the dough. If the dough is smaller, I will curve my hands in to keep them within the center of the dough. Once I have defined my crust my goal is to not touch it again. One of the hardest parts about learning to stretch is to see the big picture. Everyone focuses on what their fingertips are doing but forgets about what their palms are doing. For those with larger hands this can be difficult. If it is too uncomfortable to curl your hands in, you can also lift your palms up just enough so as not to squish your crust. Once I have my fingertips placed, I make my first stretch. I always start with smaller stretches until it becomes large enough for me to flatten out my hands or pick it up and finish the stretch. The action is concentrated between my middle and pointer fingers and is focused between my crust and about two inches down towards the middle but keeping the middle as strong as possible.
To finish the stretch, I’ll pick it up off the table and use the backs of my hands to finish it off. I use my thumbs as a guide right underneath the crust, so I always know where not to cross over. If my dough is warm or has weak spots, I will stop an inch to two inches smaller that what I need, build the pizza, and then finish the stretch on the peel before I launch it into the oven. Once you have the weight of toppings, sauce and cheese it is easier to get it to the right size and make sure there are no weak spots than to keep trying to stretch it and possibly make a hole.
Ultimately the goal of stretching is to maintain as much air within your crust as possible to ensure a light pizza but also to make sure it is as even as possible. An evenly stretched pizza means a good bake and one that will come out of the oven with no holes. Stretching is a technique that requires practice. No pizza maker became an expert after the first time and every day is different, but perfecting your technique is a great way to ensure consistency.
Laura Meyer is the owner of Pizzeria da Laura in Berkeley, CA.
>> Explore answers to more common pizza dough questions in Troubleshooting your Pizza Dough: What’s wrong with my pizza dough? <<
